Wednesday, November 13, 2013

Packing

Now that most of my planning is done.. at least to the point where we could leave tomorrow and I have a good idea of where we are going, what we are doing, and when... I turn my focus on the next big undertaking... PACKING.

I find that the key to this chore is not my husband's idea of waiting until the last minute, then frantically running around, throwing stuff into a bag, crossing your fingers, and hoping you got everything that you need!  No, I have to make a list.  Yes, I'm one of those people.. List people!

I make a list of things to pack in our suitcases.. I cover all bases!  I also make a list of things that we will carry with us in the park, as well as things we will need at our accomodations.  Oh, and I can't forget things for the car.  We drive to Disney, so it's important with a small child, to have lots of things to keep her busy.  Hubby is in charge of all of the electronics.. DVD's, Leappad, Ipods, etc..  I'm in charge of the rest.

Here are a few fun things I've picked up for our trip:

Pens for Character Autographs:  *Don't use the green sharpies.  Characters don't like them :)


Hand wipes!


Activity books and light up fans for the lines :)


Friday, November 8, 2013

May I have your Autograph please?

One of the fun things to do at Disney is to meet as many characters as you can, take a picture with them, and get their autograph!  Disney sells a few different autograph books, all are nice, but from what I've seen, they really don't give you that many pages to use.  I'm an optimistic person, so I'm hopeful that we will meet a ton of characters during our trip, even though it's bound to be very crowded.  Knowing this, I wanted another option for our trip.  So I took to Pinterest and my beloved Disney boards, and found many people making and customizing their own autograph books!  This is what I had to do..

First I went to my local craft store and picked up this book:  A Sketch book by Strathmore, and 8 1/2 x 5 1/2.  The photo below shows one with 50 pages.. mine has 100.  It was about $8 at Michaels.  Use a coupon!

Before I started anything on the inside, I covered the front (and you can do the back, too) with cardstock.  I used a quick drying glue from Scotch, as I didn't feel that glue sticks would hold it well enough. 


 Then I gave my little one some stickers, and let her decorate :)  She basically put stickers all over the front (in no particular order) and the OCD in me was cringing, but hey, it's her book.. not mine!  I did have to re-position some of them when I got the idea for the next step.  Adding a ribbon closing and decoration.

I found this awesome princess ribbon on clearance for $1 at Michaels (Always check their clearance bins!), so I wanted to use a bit of it to 'finish' off the paper edge by the spiral binding.  I took it a step further and added ribbon going across both the front and the back, and they can be tied into a bow to close.  Here's what it looks like :

Back ribbon going across book (another one was added going up and down, to hide edge)


(left) Inside cover where up and down ribbon meet.  (right) Finished cover with ribbon closing

Here's the book my teenage daughter did (sans ribbons)


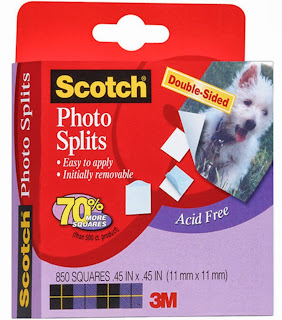
Once all of your glue and embelishments are completely dry, move to putting together the inside of your autograph book.  I found some free graphics that a member of the Dis Boards made for autograph books (look for the Creative Community board), so I printed out all of the characters that we wanted ( and there were A LOT!).  I cut them out, then used photo splits (also by Scotch - see below) to adhere the pictures into the book.


Sample graphics I printed out to put in book

I decided to attatch the autograph sections at the bottom of the page, so that after returning from our trip, I could add photos of meeting each character on the top:


My older girls really got into decorating their books.  Here are some page examples:


Happy Character Hunting!


Monday, November 4, 2013

How do you plan for Disney?

As most people know, taking a trip to Walt Disney World normally isn't just a 'fly by the seat of your pants' trip.  Unless, of course, you are an Annual Pass Holder, and are fortunate to go often.  Which, I am not.  So taking a trip to The Happiest Place on Earth is a big undertaking.. a Big Deal, and it requires a lot of planning.

So where does one even start when planning a trip to Walt Disney World?  Well, obviously you have to figure out your trip dates, and book your flight (if needed), and hotel.  I can't give you advice on any of that, as we always drive, and have only stayed in two resorts while in Disney.  First one was Shades of Green (thanks to my Father in Law), and Caribbean Beach.  Both were extremely nice.  This trip, we are saving a BUNCH of money, and staying offsite.  But still, I have to plan..

So, you've booked your airfare, or decided you are driving.  You've booked your accommodations.  You are now ready dive into the Disney Magic!  First thing I suggest you do is to print out a blank calendar for the time you are there.  If you are like me, you want to write everything down. A spiral notebook is also a great place to record all of the tidbits of info that you uncover while you plan. You can also create a spreadsheet (I do both).  Here's a sample of my "creation calendar" as I call it..


As you can see, there's a lot of writing on it!  I can tell you that most of it has changed by now. After you have your calendar ready for planning, turn to the internet for your information.  There is so much out there to help you.  One of the first things you need to decide is which park you want to go to on which day.  I did this by looking at 'Crowd Calendars' online. These crowd calendars help predict how crowded a particular park will be on a given day.  Remember that these are just predictions, based on the parks history.  They should be used as a guide only.  A great one is found at easywdw.com .  There's also a more popular crowd calendar at touringplans.com.  Bewarned though, Touring Plans charges, while easywdw is free. The Touring Plans website has many great features (including an app for your phone).  They will suggest plans for you, or let you customize your own plans, adding only the attractions that you wish to see, then telling you in what order to see them, as to maximize your day, and limit you standing in line waiting.  There is lots of information at your fingertips!  Take a look!

I'm not going to go into all of the boring details of how I plan for my trip, as I know that everyone has a different way of doing things. No two ways are wrong.  I just want to pass on the information and resources that I have used; those that have helped me out over the last few months to put this adventure together. From there, you can bury yourself under mounds of paper as you wish.
There are many Disney informational websites to read through, and lots of information to be had.  Here are a few of my favorites websites for planning
  • The Dis  -  Lots of great information, Podcasts bursting with more information, and some of the best Forums online pertaining to Disney.  If someone there can't answer your question, you'll need to go directly to Disney for the answer.  A MUST see..
  • All Ears - Another wonderful site with an abundance of great information.  
  • Passporter - Yes, they publish a book, which some consider a Disney trip bible.  They also put most of their information on line... :)
  • Mousesavers - DISCOUNTS!  This website sends out a newsletter each month, and along with it, a special link to savings.  Worth signing up for.
  • Disney World Junkies - This is actually a Facebook page.. a group of people who love Disney.  Some go ALL the time, some not so much (we can dream!), but very friendly people, and lots of chit chat.  Fun!
  • Kenny The Pirate -  This one is fun!  Not only does it contain lots of great information about the parks, etc.. but it also has lots of character information.  I have used Kenny's site more for character locations, and suggestions for interacting with the characters.  If you have little kids, or are into meeting the characters, definitely check this one out!

'Tootles!


Monday, October 28, 2013

Journaling at Disney

I know what you're thinking, "Who has time to journal at Walt Disney World?" I mean, come on! There's already so much to do, and days are jam packed from morning to night, then you collapse in your room, only to get up the next morning and do it all over again. While this may be true, I still feel the need to write down what we did during any given day. After all, you may ride the same rides, or see the same shows, but no two days in Disney are ever the same. I want to make the magic last as long as I can, and if I plan to scrapbook any photos from our trip (which I do plan on doing) then I want to have some memories to go along with the picture! And I know there will be many. All I need is a composition notebook and a pen, or a computer works just as well.

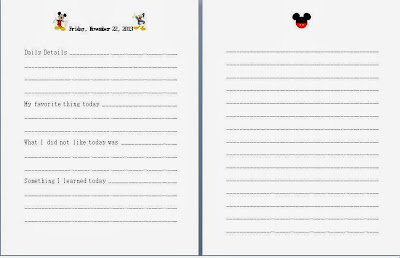
 So given that magical memories can live on forever in one's mind by writing them down, and revisiting them later, I want these memories for my kids to have as well. So I put together a journal for my youngest. She's in Kindergarten, so just learning to read and write. For her, I felt it best to have a leading journal, instead of a total free one. One where she has a mixture of answering questions, and where she can write freely. I found a journal download online, at The Mouse For Less. You can find it HERE. It gave me the bones for the journal, and I made it my own.  Here's what I came up with:


This Daily Details page is printed for each day we are there (of course the date will change), as well as the free journal page and a character list (below).


To house these journal pages, I just bought a simple report folder with pockets.  And decorated with stickers.  I'm going to let my little one put some character stickers on, but here's how it looks so far:


Once we are home, I will likely add a few pages with some of her favorite photos of the trip.  This will be yet another journaling opportunity for her, as I will let her write about each picture.  She can take this to school to share with her class!  Maybe she'll get extra credit :)

So there you have it!  Good luck with your own journal, and don't forget to make it fun! 
Don't forget to share your creations with me!  I'd love to see what you've come up with!

~ Holly


Friday, October 25, 2013

Pre Halloween Activities, starring Jesse!

My youngest was very excited when I picked her up from school today, for she knew she got to go home and put on her Halloween costume for a special event!  Our local shopping center was holding a Trick or Treat event, where the kids in the area would go store to store, trick or treating.  What fun!  Full of excitement, she promptly ran to her room when we walked in the front door, and threw on that costume.. Oh that beautiful costume!

You see, being the over planner that I am, I have been consumed a bit with clothing for our upcoming trip to Disney.. Yes, I know what you are thinking, but hey, it's fun!  I found this cute little shop offering some great deals through Zuilily, and I bought two dresses from them.  One is a Minnie Mouse themed dress, and the other is a Jesse (from Toy Story) dress.  Let me tell you, this dress is ADORABLE!  So original, so creative, and sooooo cute!  Add to it a pair of cowgirl boots, a red Jesse hat (and jean jacket since it was pretty chilly out today) and there you have an adorable little Jesse wanna be.. minus the red locks.


Of course I will share with you the maker of this wonderful creation, and that's Diva Daze Children's Boutique!  We received so many wonderful compliments on this dress!  What drew me to it was it's originality.  It wasn't like any other Jesse 'costume' that I've seen out there.. which I like.  I KNEW that the chances were pretty slim to none, that another child would show up wearing the same digs.  Success!  

Can't wait to show this one off in Disney! :)


Thursday, October 24, 2013

Countdown to The Happiest Place on Earth!

I know what you are thinking... SECOND post in ONE day!  Consider yourself lucky :)  I would have actually put this in my prior entry, but I didn't want to make it too long.  Besides it's easier to find each topic when they are separate.

To get my kids ready for our upcoming journey, because I am constantly hearing, "How many more days?", I decided to give mainly the youngest something concrete, that she could actually see and interact with.  This way, she can see for herself, how many days are actually left (And I can keep another small piece of my sanity).  Trying to figure out what to do was the hard part.  So I do what I always do, and search pinterest!  Never to disappoint, I quickly found the perfect countdown calendar to make (because all of my previous ideas included those adorable mickey head paint swatches that Home Depot so rudely no longer carries!  The nerve!!).

I actually found several versions of the countdown that I ended up making, so I adapted a few and put my own spin on it.


So here's what I used:

First, I went online and found a Mickey Head template (for the top part of the calendar).  You can find the one that I used, here.  Of course you can make it as big (or small) as you want.

Secondly, for the black links in the chain, if you want to do what I did, you need to make a template.  I don't have the capability to upload it here, but what I did was to go into Microsoft Word and make one using rectangles and circles.  You can see both the templates in this photo:  *note that I have no idea why it's sideways, for it isn't on my computer, and I can't seem to figure out how to get it to rotate here, so....


Just trace the cutouts onto your black paper and cut out.  

Here are the other supplies that I used:
Items in the picture are a paper cutter, card stock (black, white, red, yellow) - you can use whatever colors you want!, stapler, Circut cutter (for the numbers), Xyron Sticker maker (to make the numbers into stickers), ribbon (if needed to hang up), white out pen (or paint pen), and wall hangers (you could also just use tape), One direction folder - Sorry, my daughter left it on the table.  I did not use, but if you are a fan... *insert scream here*

The circut machine I used to cut out the numbers that go on the links.  You could just buy number stickers at a craft store, but this was cheaper for me (those stickers are expensive!).  I used the Xyron machine to turn them into stickers.

So here's what you do... First you need to cut out your two templates that we talked about above.  Then you need to cut out your paper strips for your links.  Figure out how many days you need on your countdown, and go from there.  *note that my white links do not have dates on them.  They were necessary so that the mickey heads would sit correctly in the chain.  I plan to use these white links as "special links" where my daugher will pull them off with the link above, and get a special Disney treat (could be an activity, or snack, or something to take with her on the trip).  

Once you have all of your strips cut out, draw Mickey's buttons on the red strips (in the middle) with your white out pen, and allow to dry.  You can also use a paint pen (I didn't have one).  Next, it's time to start assembling!  Starting at the top, staple your first white link onto the Calendar head ( I hid the staple with the little red mickey head - also made with the circut machine).  For the center circle, I just typed something up in Word, printed it out, and cut into a circle.  Glue on.


 Now attatch the first black strip.  *Note if you chose to make the black strips with the Mickey ears, fold the ears up before you start linking (makes it easier).  Now go on and make the rest of your chain.  

Once you are finished making your chain, now add the numbers!  I waited to do this last so that I could make sure I ended up with enough links... yeah, math isn't my strong suit ;)


Have fun!


Absentee

Well, once again I've been MIA.  I think I am just very easily distracted.  I have grand plans of blogging every day, or at least once a week, and then I forget.  Maybe I just don't have very many exciting things going on in my life, or interesting crafts that I'm making, or yummy foods that I'm cooking, to blog about.  Well, that needs to change!  I am making a prediction that I will be on here once a week from now until the end of November.  Surely there must be a reason, and there is.  WE ARE GOING TO DISNEY WORLD!  Do I really need to say anything more?  There are many people out there, including my husband, who do not understand the draw to this magical wonderland, but there is an entire subculture of us who do.  I know that going to Disney isn't relaxing, and that you need a vacation to recover from your Disney vacation, but there's just something about the place.  Maybe it's the chance to throw yourself into a fantasy world, helping you escape reality and the stresses that go hand in hand with every day life.  Most little girls want to be a Princess when they grow up, and I was no different.  At Disney World, I CAN be a princess.  I can even wear a tiara, or blinged out Mickey Mouse ears, and NOBODY stares at me strangely.  In fact, I'm much more likely to get a smile or a compliment than an odd look. How awesome is that!?  Anyway, we are going and I'm extremely excited.  And, I'm planning....

My husband often asks me, "Can't we just skip all of this planning and just go and see what each day holds for us?"  Um... NO.  If we were able to go to Disney often, that might be an option, but it's not a place that our bank account smiles upon, so our trips are few and far between.  So yes, I will plan.  :D

Planning has begun, including making Tshirts a Countdown Calendar for the wee one, and Disney Tshirts for us ALL.  Yes, hubby will be sporting some homemade Tshirts as well.  Though he isn't thrilled about it! :D  Of course whatever crafts I end up making, I will share with you.  I'd love to take credit for all of the ideas, but more than likely I have found the ideas on Pinterest (love that site!).

So let's begin...  First, I have begun making some Tshirts.  My oldest daughter is VERY crafty, so we thought that we'd try our hand at some Mickey Head Tye Dye Tshirts.  I found the instructions on a Disney site that I frequent, called The Dis.  You can just follow the link above :)  Ultimately, though we really would like to make them, we have opted not to give them a go.. mainly due to time and $$.  The Tshirts I have decided to make are simple iron on transfers.  There are many images that you can find online that you can turn into an iron on transfer for your tshirts.  However, I purchased a few "Mickey Heads" on Etsy.  Go visit Michelle at Swirly Color Pixels on Etsy.  Her designs are the best I've found, and every single one I purchased from her printed AMAZINGLY.  Colors are vibrant and wonderful.   Here are some examples of the shirts I've made so far (I still have many to do):


These Mickey & Minnie Thanksgiving images were created especially for me.  Michelle at Swirly Color Pixels will work with you to make the perfect custom graphic!  Don't worry though, she also has a bunch of Disney creations already made and ready for purchase.  They are all very clever and cute!

Now for the question, "How did you do that?"  Well, first you download the graphic.  Then you have to get the image from your computer to an iron on transfer sheet.  I HIGHLY suggest using Avery transfer sheets for Dark Shirts.  The transfer sheets for Dark shirts hold the color much better, and print much more vibrantly.  I have an example in the picture below.  When I went to print this Mike W image on a black shirt, I had run out of the dark transfers.  So, I used a regular transfer sheet for the image.  I had to redo it on a transfer sheet for dark shirts, for you can see that the regular sheet barely showed up.  If you like the 'vintage' look, then go for it!  But we wanted bright colors :)


Avery's website has a very useful tool to aide you in the whole process.  Follow the directions that come with the transfer sheets, and it will explain everything to you.  Happy ironing :)

Wednesday, April 24, 2013

Lumpia... not Oompa Loompa!!

Ahhh... Lumpia... just the word itself, bring a big smile to my face.  When I hear the word, I can smell them.. I can taste them... and so many childhood memories come running back to me.  Yes, I have a fondness to Lumpia, thanks to the Oy family who were members of my church growing up, and friends of my parents.  Every year, our church would have a bazaar.. Church members would sell crafts, unwanted items, as well as baked goods.  But the Oy family... oh the Oy family.. they sold a little piece of heaven!  LUMPIA!  We liked it so much, that they shared their family recipe with my parents.

Over the years, that recipe has been lost, however my Mother could remember what she put in them when she'd make it.  I have now shared this delightful treat with my family, and I am positive that some day, they will share it with their own families.  I have shared this before on my blog, and going to share it again!

Keep in mind that you can add your own touch to your Lumpia.. you can use chicken, pork, whatever you want!  Be creative!

Unfortunately, I don't have exact measurements for my recipe, but I will do my best!


What you'll need:  
  • Lumpia Wrappers - I find mine at a local Asian grocery store
  • Ground beef - for this Lumpia making session, I used 2 pounds of ground beef.  I make one batch plain (just the beef and seasoning) for my picky eater..
  • Soy Sauce
  • Carrots - diced small (about a handful and a half)
  • Celery - diced small (about a handful and a half)
  • Chinese Cabbage (about a handful), chopped
  • 1 can of water chestnuts - diced
  • Bean Sprouts if desired - I left them out because my family complains about them! lol
What you do:

  1. Brown your meat.  Make sure you get the meat broken up small..

  2. Drain meat, then add Soy Sauce (to taste).  I probably used about 1/4 cup.  Cook on Medium low for about 3 minutes.
  3. Add Carrots to mix first, as they take the longest to cook.  After another 3 minutes, add Celery and Water Chestnuts.
  4. Continue to cook about another 3 minutes, then add your cabbage.  Simmer for about 5 minutes, or until everything is hot.  
  5. Remove from heat and let rest.

Now you are ready to wrap!

Wrapping your Lumpia is very easy!  I should have mentioned that you can find Lumpia wrappers in two different packaging options.  The easiest (and more expensive) is the individual wrappers.. The wrappers are separated by a sheet of paper, which makes it much easier to remove the wrapper for use.  I buy the ones that I have to separate myself , to keep costs down.

  1. Lay your wrapper on a flat surface, and add a spoonful of your filling.


  2. Next roll up the bottom, covering the filling.
  3. Fold over your two sides.
  4. Roll up again, tucking in the sides once more, by folding them in (like wrapping a present).
  5. Brush the very tip of the remaining wrapper with water, and finish rolling.  Press gently against the wet part to make sure it sticks.

    Your finished Lumpia will look like this:

    To cook them, simply fill a pan with about a 1/2 inch of cooking oil (I prefer Peanut, as it just cooks better), and fry Lumpia until brown on both sides (turning often).  Drain on paper towels. 

    Enjoy!


Friday, April 19, 2013

Bagel Me!

So this self titled "non baker" is at it again!  Only this time, it's not a cake, pie, or tart in the oven, it's BAGELS!  I know, I've put on my brave hat today and am taking the plunge.  Maybe, just maybe, I'll turn out to be a baker afterall... though I highly doubt it.  LOL

I found this recipe on another blog, Little Pink Monster .  She in turn, got her recipe for the bagels from Everyday Emma.  So here we go!

Everything Bagels
(this photo by: Everyday Emma)


What you need:  
1 1/4 cup warm water
1 1/2 tablespoon sugar
2 tsp (one package) active dry yeast
3 1/2 cups bread flour
1 1/2 tsp salt
2 tbsp sesame seeds
1 tsp caraway seeds
2 tsp poppy seeds
1 tsp coarse grain sea salt
1 egg


In a small bowl, combine warm water and sugar.  Let the sugar dissolve completely.   Next, pour in the yeast and allow to sit for 6-8 minutes to activate.  In a larger bowl, whisk the flour and 1/1/2 tsp salt.  Once the yeast mixture is active, pour it into the flour mixture and stir until it forms a crumbly dough.  (see photo below)


Now turn out the dough on a floured surface and knead for 6-7 minutes, until the dough becomes elastic-like.  I actually did this using my mixer and my dough hook attatchment.  Dough will look like photo below.


Now place your dough in a lightly oiled bowl, cover the bowl and place in a warm place for 1 hour to rise.


Once risen, turn the dough out onto a lightly floured surface.  Divide it into 8 equal pieces.

Shape each piece of dough into a ball.  Press your finger into the center to form the hole.  Once all of the bagels are shaped, allow them to rest for 10 minutes. 


Next, place them into boiling water (they should float).  Let them cook for 45-60 seconds, per side, and remove to your baking sheet.


Next, whisk 1 egg and 1 tsp water in a small bowl and brush each bagel with the egg mixture.  Now sprinkle on the seeds!  I made some with just sesame seeds, some plain, and some with everything!

After you add your seeds, bake in a 425 oven for 20 minutes.  

** Mine are baking right now, and I cannot even begin to tell you how AMAZING my house smells right now!  


They're done!   


They look AMAZING!


I think I have a new obsession!  Blueberry is next....